csharp
java
javascript
php
python
ruby
typescript

oauth

/oauth

OAuth guide

UltraCart allows you to build applications that communicate with the UltraCart service on behalf of users. You will need to have each use authenticate, verify their identity, with UltraCart and then grant permission to your application to access data on their UltraCart account.

UltraCart uses OAuth 2, an open specification, for third party application authentication. Once a user completes the OAuth process, an access token is returned to your application. The access token is a long string generated by UltraCart that you'll need to send with each subsequent API request to uniquely identify both your application and the end user.

There are several important benefits that lead us to select OAuth:

This makes OAuth a safer and more secure form of API authorization for your users.

Setting up your application

Before you can get started, you'll need to register your application with UltraCart under:

Configuration -> Back Office -> Authorized Applications -> Developer Applications

Under this management screen you will be able to configure the application name, developer information, redirect URL, and permissions.

After creating your application, you are ready to set-up the authorization process in your application. The UltraCart SDKs contain the API methods below to assist in the OAuth flow.
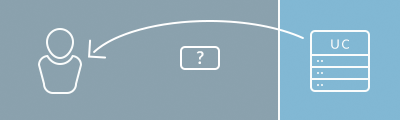
OAuth 2 flow

Here's a simple diagram of the OAuth 2 flow - the process for authorizing your users with UltraCart.

User App: Load my item information from UltraCart.

App UltraCart: User would like to load item information from UltraCart

UltraCart User: User would like allow the application to load your item information?

User UltraCart: Yes, allow the application access to my item information

The Application and UltraCart can now send and recieve the users item information.

The high level idea is that the user will be redirected to UltraCart to authorize your application to access their UltraCart data. After the user has approved your application, they'll be sent back to your application with an authorization code. At this point your application will exchange the authorization code for an access token which can be used to make subsequent requests to the UltraCart API (not shown in the diagram above).

  1. User presses a “Connect” button
  2. Your App redirects the user to a UltraCart webpage. /oauth2/authorize?response_type=code
  1. The user logs into UltraCart and authorizes your app
  2. UltraCart redirects the user back to your app using the redirect_uri you provided.
  1. Your app exchanges the authorization code for a reusable access token (not visible to the user).

If you're building a web application, the first step in the OAuth process is to redirect the user to an UltraCart web page. Typically the user takes some action on your site, such as clicking a "Connect to UltraCart" button, and your application will need to redirect the user to a particular UltraCart authorization URL.

The UltraCart authorization URL is specific to your application and is composed of your client ID, redirect URI, response type, and state (it looks something like https://secure.ultracart.com/admin/v2/oauth/authorize?client_id=...&redirect_uri=...&state=...&response_type=code). The complete /authorize URL is documented below. You will need to generate this complete URL and have the user click on it to start the process. Make sure you are careful about properly URL encoding each parameter value when building the URL.

At this point in the flow, the user will need to login to UltraCart. Once the user is logged into UltraCart, they will be presented with a screen to authorize your application to access their UltraCart data.

TODO: UltraCart authorize screen

After the user approves your application, they'll be redirected from UltraCart back to your application using the redirect URI provided in the application configuration or UltraCart authorization URL. For security, this redirect URI must match one of the redirect URIs you have specified for your application and also contain a secret state parameter which will be returned in the redirect.

The redirect back to your application will include an authorization code from UltraCart. Your application will then need to exchange the authorization code for a re-usable access token immediately. The exchange takes place in the background of your application using a call to the /token API documented below.

The access token is the important credential that is needed to make successful UltraCart API calls. You'll want to store this within your application securely and it should not be displayed to the end user.

Now your application is authorized to use the UltraCart API on behalf of your user. When you'd like to make API calls to UltraCart, simply include the authorization header, Authorization: Bearer <YOUR_ACCESS_TOKEN_HERE>, with each request.

Authorize an application

get
/oauth/authorize

The link that a customer must click on to begin the authorization process. This is not an API call that you can make from your application, but is a link that you need to construct and then have your user click on it to authorize your application.

SDK Function Name: oauthAuthorize

Parameters
Parameter Description Location Data Type Required
client_id The OAuth application client_id. query string required
redirect_uri The URL to redirect the users browser back to once authorization is granted. This can only be specified if the application profile does not include a pre-configured redirect_uri. query string optional
scope The permission scope requested. This can only be specified if the application profile does not include a pre-configured scope. query string optional
state A unique value generated by your application to assist in authenticating the redirect back. query string required
response_type Type of response
Allowed Values
  • code
query string required
Responses
Status Code Reason Response Model
307
Temporary Redirect 307
400
Bad Request 400
403
Forbidden 403
404
Not Found 404
500
Server Side 500
using System.Web;

namespace SdkSample.oauth
{
    public class OauthAuthorize
    {
        /*
         * Note: You will never call this method from any sdk. This method is not meant to be called from your application.
         * Our sdk_samples are auto generated by our framework. Therefore, this sample file was created automatically.
         * But, this is not a sdk function. The underlying endpoint is what your application should direct users to in order
         * to authorize your application.
         * 
         * The first step in implementing an OAuth authorization to your UltraCart Developer Application is
         * creating a Client ID and Secret. See the following doc for instructions on doing so:
         * https://ultracart.atlassian.net/wiki/spaces/ucdoc/pages/3488907265/Developer+Applications+-+Creating+a+Client+ID+and+Secret+for+an+OAuth+Application
         * 
         * Once you have your Client ID and Secret created, our OAuth security follows the industry standards.
         * 1. Construct an authorize url for your customers.
         * 2. Your customers will follow the link and authorize your application.
         * 3. Store their oauth credentials as best fits your application.
         * 
         * This sample shows how someone might construct the authorize url. Note that we don't provide the scope here.
         * We set the scope when we created the developer application (generated client id and secret). See the above doc link
         * for details.
         */
        public static void Execute()
        {
            string clientId = "5e31ce86e17f02015a35257c47151544";
            string state = "denmark";  // this is whatever you want it to be. random string. but it is required.
            string redirectUrl = "https://www.mywebsite.com/oauth/redirect_here.php";
            string responseType = "code"; // for ultracart applications, this must always be 'code'

            var parameters = HttpUtility.ParseQueryString(string.Empty);
            parameters["response_type"] = responseType;
            parameters["client_id"] = clientId;
            parameters["redirect_uri"] = redirectUrl;
            parameters["state"] = state;

            string url = "https://secure.ultracart.com/rest/v2/oauth/authorize?" + parameters.ToString();

            // Note: Implementation of redirect will depend on your web framework
            // Here's an example using ASP.NET:
            // HttpContext.Current.Response.Redirect(url);
        }
    }
}
package oauth;

import common.Constants;

public class OauthAuthorize {
   /*
    * Note: You will never call this method from any sdk. This method is not meant to be called from your application.
    * Our sdk_samples are auto generated by our framework. Therefore, this sample file was created automatically.
    * But, this is not a sdk function. The underlying endpoint is what your application should direct users to in order
    * to authorize your application.
    * 
    * The first step in implementing an OAuth authorization to your UltraCart Developer Application is
    * creating a Client ID and Secret. See the following doc for instructions on doing so:
    * https://ultracart.atlassian.net/wiki/spaces/ucdoc/pages/3488907265/Developer+Applications+-+Creating+a+Client+ID+and+Secret+for+an+OAuth+Application
    * 
    * Once you have your Client ID and Secret created, our OAuth security follows the industry standards.
    * 1. Construct an authorize url for your customers.
    * 2. Your customers will follow the link and authorize your application.
    * 3. Store their oauth credentials as best fits your application.
    * 
    * This sample shows how someone might construct the authorize url. Note that we don't provide the scope here.
    * We set the scope when we created the developer application (generated client id and secret). See the above doc link
    * for details.
    */
   public static void execute() {
       String clientId = "5e31ce86e17f02015a35257c47151544";
       String state = "denmark";  // this is whatever you want it to be. random string. but it is required.
       String redirectUrl = "https://www.mywebsite.com/oauth/redirect_here.php";
       String responseType = "code"; // for ultracart applications, this must always be 'code'

       StringBuilder parameters = new StringBuilder();
       parameters.append("response_type=").append(responseType)
                .append("&client_id=").append(clientId)
                .append("&redirect_uri=").append(redirectUrl)
                .append("&state=").append(state);

       String url = "https://secure.ultracart.com/rest/v2/oauth/authorize?" + parameters.toString();

       // Note: Implementation of redirect will depend on your web framework
   }
}
// Namespace-like structure using a class
export class OauthAuthorize {
  /*
   * Note: You will never call this method from any sdk. This method is not meant to be called from your application.
   * Our sdk_samples are auto generated by our framework. Therefore, this sample file was created automatically.
   * But, this is not a sdk function. The underlying endpoint is what your application should direct users to in order
   * to authorize your application.
   *
   * The first step in implementing an OAuth authorization to your UltraCart Developer Application is
   * creating a Client ID and Secret. See the following doc for instructions on doing so:
   * https://ultracart.atlassian.net/wiki/spaces/ucdoc/pages/3488907265/Developer+Applications+-+Creating+a+Client+ID+and+Secret+for+an+OAuth+Application
   *
   * Once you have your Client ID and Secret created, our OAuth security follows the industry standards.
   * 1. Construct an authorize url for your customers.
   * 2. Your customers will follow the link and authorize your application.
   * 3. Store their oauth credentials as best fits your application.
   *
   * This sample shows how someone might construct the authorize url. Note that we don't provide the scope here.
   * We set the scope when we created the developer application (generated client id and secret). See the above doc link
   * for details.
   */
  static execute() {
    const clientId = "5e31ce86e17f02015a35257c47151544";
    const state = "denmark"; // this is whatever you want it to be. random string. but it is required.
    const redirectUrl = "https://www.mywebsite.com/oauth/redirect_here.php";
    const responseType = "code"; // for ultracart applications, this must always be 'code'

    // Construct query parameters
    const parameters = new URLSearchParams();
    parameters.set("response_type", responseType);
    parameters.set("client_id", clientId);
    parameters.set("redirect_uri", redirectUrl);
    parameters.set("state", state);

    const url = `https://secure.ultracart.com/rest/v2/oauth/authorize?${parameters.toString()}`;

    // Note: Implementation of redirect will depend on your web framework
    // For Node.js (e.g., Express): res.redirect(url);
    // For browser: window.location.href = url;
    return url;
  }
}

// Example usage (adjust based on your environment)
console.log(OauthAuthorize.execute());

// For Node.js (Express example, uncomment if applicable):
/*
import express from 'express';
const app = express();
app.get('/oauth/authorize', (req, res) => {
  const url = OauthAuthorize.execute();
  res.redirect(url);
});
*/

// For browser (uncomment if applicable):
/*
window.location.href = OauthAuthorize.execute();
*/
<?php

ini_set('display_errors', 1);

/*

Note:  You will never call this method from any sdk.  This method is not meant to be called from your application.
Our sdk_samples are auto generated by our framework.  Therefore, this sample file was created automatically.
But, this is not a sdk function.  The underlying endpoint is what your application should direct users to in order
to authorize your application.

The first step in implementing an OAuth authorization to your UltraCart Developer Application is
creating a Client ID and Secret.  See the following doc for instructions on doing so:
https://ultracart.atlassian.net/wiki/spaces/ucdoc/pages/3488907265/Developer+Applications+-+Creating+a+Client+ID+and+Secret+for+an+OAuth+Application

Once you have your Client ID and Secret created, our OAuth security follows the industry standards.
1. Construct an authorize url for your customers.
2. Your customers will follow the link and authorize your application.
3. Store their oauth credentials as best fits your application.

This sample shows how someone might construct the authorize url.  Note that we don't provide the scope here.
We set the scope when we created the developer application (generated client id and secret).  See the above doc link
for details.

 */

$clientId = "5e31ce86e17f02015a35257c47151544";
$state = "denmark";  // this is whatever you want it to be.  random string.  but it is required.
$redirect_url = "https://www.mywebsite.com/oauth/redirect_here.php";
$response_type = "code"; // for ultracart applications, this must always be 'code'

// Using http_build_query (best for multiple parameters)
$params = [
    'response_type' => $response_type,
    'client_id' => $clientId,
    'redirect_uri' => $redirect_url,
    'state' => $state
];
$url = 'https://secure.ultracart.com/rest/v2/oauth/authorize?' . http_build_query($params);

header("Location: " . $url);
exit;

"""
Note:  You will never call this method from any sdk.  This method is not meant to be called from your application.
Our sdk_samples are auto generated by our framework.  Therefore, this sample file was created automatically.
But, this is not a sdk function.  The underlying endpoint is what your application should direct users to in order
to authorize your application.

The first step in implementing an OAuth authorization to your UltraCart Developer Application is
creating a Client ID and Secret.  See the following doc for instructions on doing so:
https://ultracart.atlassian.net/wiki/spaces/ucdoc/pages/3488907265/Developer+Applications+-+Creating+a+Client+ID+and+Secret+for+an+OAuth+Application

Once you have your Client ID and Secret created, our OAuth security follows the industry standards.
1. Construct an authorize url for your customers.
2. Your customers will follow the link and authorize your application.
3. Store their oauth credentials as best fits your application.

This sample shows how someone might construct the authorize url.  Note that we don't provide the scope here.
We set the scope when we created the developer application (generated client id and secret).  See the above doc link
for details.
"""

from flask import redirect
import urllib.parse

# this is whatever you want it to be.  random string.  but it is required.
client_id = "5e31ce86e17f02015a35257c47151544"
state = "denmark"
redirect_url = "https://www.mywebsite.com/oauth/redirect_here.php"
response_type = "code"  # for ultracart applications, this must always be 'code'

# Using urllib.parse.urlencode (best for multiple parameters)
params = {
    'response_type': response_type,
    'client_id': client_id,
    'redirect_uri': redirect_url,
    'state': state
}
url = 'https://secure.ultracart.com/rest/v2/oauth/authorize?' + urllib.parse.urlencode(params)

# In a Flask route, you would use:
# return redirect(url)
=begin

Note:  You will never call this method from any sdk.  This method is not meant to be called from your application.
Our sdk_samples are auto generated by our framework.  Therefore, this sample file was created automatically.
But, this is not a sdk function.  The underlying endpoint is what your application should direct users to in order
to authorize your application.

The first step in implementing an OAuth authorization to your UltraCart Developer Application is
creating a Client ID and Secret.  See the following doc for instructions on doing so:
https://ultracart.atlassian.net/wiki/spaces/ucdoc/pages/3488907265/Developer+Applications+-+Creating+a+Client+ID+and+Secret+for+an+OAuth+Application

Once you have your Client ID and Secret created, our OAuth security follows the industry standards.
1. Construct an authorize url for your customers.
2. Your customers will follow the link and authorize your application.
3. Store their oauth credentials as best fits your application.

This sample shows how someone might construct the authorize url.  Note that we don't provide the scope here.
We set the scope when we created the developer application (generated client id and secret).  See the above doc link
for details.

=end

require 'uri'

client_id = "5e31ce86e17f02015a35257c47151544"
state = "denmark"  # this is whatever you want it to be.  random string.  but it is required.
redirect_url = "https://www.mywebsite.com/oauth/redirect_here.php"
response_type = "code" # for ultracart applications, this must always be 'code'

# Using URI.encode_www_form (Ruby equivalent of http_build_query)
params = {
  response_type: response_type,
  client_id: client_id,
  redirect_uri: redirect_url,
  state: state
}
url = 'https://secure.ultracart.com/rest/v2/oauth/authorize?' + URI.encode_www_form(params)

# In a web framework like Rails, you would use:
# redirect_to url
# But for a basic script, you might want to just print the URL:
puts url
// Namespace-like structure using a class
export class OauthAuthorize {
  /*
   * Note: You will never call this method from any sdk. This method is not meant to be called from your application.
   * Our sdk_samples are auto generated by our framework. Therefore, this sample file was created automatically.
   * But, this is not a sdk function. The underlying endpoint is what your application should direct users to in order
   * to authorize your application.
   *
   * The first step in implementing an OAuth authorization to your UltraCart Developer Application is
   * creating a Client ID and Secret. See the following doc for instructions on doing so:
   * https://ultracart.atlassian.net/wiki/spaces/ucdoc/pages/3488907265/Developer+Applications+-+Creating+a+Client+ID+and+Secret+for+an+OAuth+Application
   *
   * Once you have your Client ID and Secret created, our OAuth security follows the industry standards.
   * 1. Construct an authorize url for your customers.
   * 2. Your customers will follow the link and authorize your application.
   * 3. Store their oauth credentials as best fits your application.
   *
   * This sample shows how someone might construct the authorize url. Note that we don't provide the scope here.
   * We set the scope when we created the developer application (generated client id and secret). See the above doc link
   * for details.
   */
  public static execute(): string {
    const clientId = "5e31ce86e17f02015a35257c47151544";
    const state = "denmark"; // this is whatever you want it to be. random string. but it is required.
    const redirectUrl = "https://www.mywebsite.com/oauth/redirect_here.php";
    const responseType = "code"; // for ultracart applications, this must always be 'code'

    // Construct query parameters
    const parameters = new URLSearchParams();
    parameters.set("response_type", responseType);
    parameters.set("client_id", clientId);
    parameters.set("redirect_uri", redirectUrl);
    parameters.set("state", state);

    const url = `https://secure.ultracart.com/rest/v2/oauth/authorize?${parameters.toString()}`;

    // Note: Implementation of redirect will depend on your web framework
    // For Node.js (e.g., Express): res.redirect(url);
    // For browser: window.location.href = url;
    return url;
  }
}

// Example usage (adjust based on your environment)
console.log(OauthAuthorize.execute());

// For Node.js (Express example, uncomment if applicable):
/*
import express from 'express';
const app = express();
app.get('/oauth/authorize', (req, res) => {
  const url = OauthAuthorize.execute();
  res.redirect(url);
});
*/

// For browser (uncomment if applicable):
/*
window.location.href = OauthAuthorize.execute();
*/

Revoke this OAuth application.

Consumes: application/x-www-form-urlencoded
Produces: application/json
post
/oauth/revoke

Revokes the OAuth application associated with the specified client_id and token.

SDK Function Name: oauthRevoke

Parameters
Parameter Description Location Data Type Required
client_id The OAuth application client_id. formData string required
token The OAuth access token that is to be revoked.. formData string required
Responses
Status Code Reason Response Model
200
Successful response OauthRevokeSuccessResponse
400
Bad Request 400
500
Server Side 500
using com.ultracart.admin.v2.Api;
using com.ultracart.admin.v2.Model;

namespace SdkSample.oauth
{
    public class OauthRevoke 
    {
        /*
         * This is a last feature of the UltraCart OAuth Security Implementation.
         * oauthRevoke is used to kill an access token.
         * Call this method when a customer desires to terminate using your Developer Application.
         *
         * The first step in implementing an OAuth authorization to your UltraCart Developer Application is
         * creating a Client ID and Secret. See the following doc for instructions on doing so:
         * https://ultracart.atlassian.net/wiki/spaces/ucdoc/pages/3488907265/Developer+Applications+-+Creating+a+Client+ID+and+Secret+for+an+OAuth+Application
         */
        public static void Execute()
        {
            string clientId = "5e31ce86e17f02015a35257c47151544";  // this is given to you when you create your application (see the doc link above)
            string accessToken = "123456789012345678901234567890"; // this is stored by your application somewhere somehow.

            OauthApi oauthApi = new OauthApi(Constants.ApiKey);
            OauthRevokeSuccessResponse apiResponse = oauthApi.OauthRevoke(clientId, accessToken);

            // apiResponse is an OauthRevokeSuccessResponse object
            bool successful = apiResponse.Successful;
            string message = apiResponse.Message;
        }
    }
}
package oauth;

import com.ultracart.admin.v2.OauthApi;
import com.ultracart.admin.v2.models.*;
import com.ultracart.admin.v2.util.ApiException;
import common.Constants;

public class OauthRevoke {
   /*
    * This is a last feature of the UltraCart OAuth Security Implementation.
    * oauthRevoke is used to kill an access token.
    * Call this method when a customer desires to terminate using your Developer Application.
    *
    * The first step in implementing an OAuth authorization to your UltraCart Developer Application is
    * creating a Client ID and Secret. See the following doc for instructions on doing so:
    * https://ultracart.atlassian.net/wiki/spaces/ucdoc/pages/3488907265/Developer+Applications+-+Creating+a+Client+ID+and+Secret+for+an+OAuth+Application
    */
   public static void execute() throws ApiException {
       String clientId = "5e31ce86e17f02015a35257c47151544";  // this is given to you when you create your application (see the doc link above)
       String accessToken = "123456789012345678901234567890"; // this is stored by your application somewhere somehow.

       OauthApi oauthApi = new OauthApi(Constants.API_KEY);
       OauthRevokeSuccessResponse apiResponse = oauthApi.oauthRevoke(clientId, accessToken);

       // apiResponse is an OauthRevokeSuccessResponse object
       boolean successful = apiResponse.getSuccessful();
       String message = apiResponse.getMessage();
   }
}
// Import API and UltraCart types
import { oauthApi } from '../api.js';

// Namespace-like structure using a class
export class OauthRevoke {
  /*
   * This is a last feature of the UltraCart OAuth Security Implementation.
   * oauthRevoke is used to kill an access token.
   * Call this method when a customer desires to terminate using your Developer Application.
   *
   * The first step in implementing an OAuth authorization to your UltraCart Developer Application is
   * creating a Client ID and Secret. See the following doc for instructions on doing so:
   * https://ultracart.atlassian.net/wiki/spaces/ucdoc/pages/3488907265/Developer+Applications+-+Creating+a+Client+ID+and+Secret+for+an+OAuth+Application
   */
  static async execute() {
    const clientId = "5e31ce86e17f02015a35257c47151544"; // this is given to you when you create your application (see the doc link above)
    const token = "123456789012345678901234567890"; // this is stored by your application somewhere somehow.

    try {
      // UltraCart API call with parameters as an anonymous object
      const apiResponse = await new Promise((resolve, reject) => {
        oauthApi.oauthRevoke(clientId, token, function (error, data, response) {
          if (error) {
            reject(error);
          } else {
            resolve(data, response);
          }
        });
      });

      // apiResponse is an OauthRevokeSuccessResponse object
      const successful = apiResponse.successful;
      const message = apiResponse.message;

      console.log("OAuth Revoke Response:");
      console.log(`Successful: ${successful}`);
      console.log(`Message: ${message}`);
    } catch (ex) {
      console.log(`Error: ${ex.message}`);
      console.log(ex.stack);
    }
  }
}

// Example usage (optional, remove if not needed)
OauthRevoke.execute().catch(console.error);
<?php

use ultracart\v2\api\OauthApi;

ini_set('display_errors', 1);

/*

This is a last feature of the UltraCart OAuth Security Implementation.
oauthRevoke is used to kill an access token.
Call this method when a customer desires to terminate using your Developer Application.


The first step in implementing an OAuth authorization to your UltraCart Developer Application is
creating a Client ID and Secret.  See the following doc for instructions on doing so:
https://ultracart.atlassian.net/wiki/spaces/ucdoc/pages/3488907265/Developer+Applications+-+Creating+a+Client+ID+and+Secret+for+an+OAuth+Application

 */

$clientId = "5e31ce86e17f02015a35257c47151544";  // this is given to you when you create your application (see the doc link above)
$accessToken = "123456789012345678901234567890"; // this is stored by your application somewhere somehow.

$oauth_api = OauthApi::usingApiKey(Constants::API_KEY);
$api_response = $oauth_api->oauthRevoke($clientId, $accessToken);

// $api_response is an OauthRevokeSuccessResponse object.
var_dump($api_response);
$successful = $api_response->getSuccessful();
$message = $api_response->getMessage();
"""
This is a last feature of the UltraCart OAuth Security Implementation.
oauthRevoke is used to kill an access token.
Call this method when a customer desires to terminate using your Developer Application.

The first step in implementing an OAuth authorization to your UltraCart Developer Application is
creating a Client ID and Secret.  See the following doc for instructions on doing so:
https://ultracart.atlassian.net/wiki/spaces/ucdoc/pages/3488907265/Developer+Applications+-+Creating+a+Client+ID+and+Secret+for+an+OAuth+Application
"""

from ultracart.apis import OauthApi
from samples import api_client

# this is given to you when you create your application (see the doc link above)
client_id = "5e31ce86e17f02015a35257c47151544"
# this is stored by your application somewhere somehow.
access_token = "123456789012345678901234567890"

# Create OAuth API instance
oauth_api = OauthApi(api_client())

# Call the OAuth revoke method
api_response = oauth_api.oauth_revoke(client_id=client_id, access_token=access_token)

# api_response is an OauthRevokeSuccessResponse object.
print(api_response)

# Extract success status and message
successful = api_response.successful
message = api_response.message
require 'ultracart_api'
require_relative '../constants'

=begin

This is a last feature of the UltraCart OAuth Security Implementation.
oauthRevoke is used to kill an access token.
Call this method when a customer desires to terminate using your Developer Application.


The first step in implementing an OAuth authorization to your UltraCart Developer Application is
creating a Client ID and Secret.  See the following doc for instructions on doing so:
https://ultracart.atlassian.net/wiki/spaces/ucdoc/pages/3488907265/Developer+Applications+-+Creating+a+Client+ID+and+Secret+for+an+OAuth+Application

=end

client_id = "5e31ce86e17f02015a35257c47151544"  # this is given to you when you create your application (see the doc link above)
access_token = "123456789012345678901234567890" # this is stored by your application somewhere somehow.

oauth_api = UltracartClient::OauthApi.new_using_api_key(Constants::API_KEY)
api_response = oauth_api.oauth_revoke(client_id, access_token)

# api_response is an OauthRevokeSuccessResponse object.
puts api_response.inspect
successful = api_response.successful
message = api_response.message
// Import API and UltraCart types
import { oauthApi } from '../api';
import { OauthRevokeSuccessResponse } from 'ultracart_rest_api_v2_typescript';

// Namespace-like structure using a class
export class OauthRevoke {
  /*
   * This is a last feature of the UltraCart OAuth Security Implementation.
   * oauthRevoke is used to kill an access token.
   * Call this method when a customer desires to terminate using your Developer Application.
   *
   * The first step in implementing an OAuth authorization to your UltraCart Developer Application is
   * creating a Client ID and Secret. See the following doc for instructions on doing so:
   * https://ultracart.atlassian.net/wiki/spaces/ucdoc/pages/3488907265/Developer+Applications+-+Creating+a+Client+ID+and+Secret+for+an+OAuth+Application
   */
  public static async execute(): Promise<void> {
    const clientId = "5e31ce86e17f02015a35257c47151544"; // this is given to you when you create your application (see the doc link above)
    const token = "123456789012345678901234567890"; // this is stored by your application somewhere somehow.

    try {
      // UltraCart API call with parameters as an anonymous interface
      const apiResponse = await oauthApi.oauthRevoke({
        clientId,
        token,
      });

      // apiResponse is an OauthRevokeSuccessResponse object
      const successful = apiResponse.successful;
      const message = apiResponse.message;

      console.log("OAuth Revoke Response:");
      console.log(`Successful: ${successful}`);
      console.log(`Message: ${message}`);
    } catch (ex) {
      console.log(`Error: ${(ex as Error).message}`);
      console.log((ex as Error).stack);
    }
  }
}

// Example usage (optional, remove if not needed)
OauthRevoke.execute().catch(console.error);

Exchange authorization code for access token.

Consumes: application/x-www-form-urlencoded
Produces: application/json
post
/oauth/token

The final leg in the OAuth process which exchanges the specified access token for the access code needed to make API calls.

SDK Function Name: oauthAccessToken

Parameters
Parameter Description Location Data Type Required
client_id The OAuth application client_id. formData string required
grant_type Type of grant
Allowed Values
  • authorization_code
  • refresh_token
formData string required
code Authorization code received back from the browser redirect formData string required if
grant_type=authorization_code
redirect_uri The URI that you redirect the browser to start the authorization process formData string required if
grant_type=authorization_code
refresh_token The refresh token received during the original grant_type=authorization_code that can be used to return a new access token formData string required if
grant_type=refresh_token
Responses
Status Code Reason Response Model
200
Successful response OauthTokenResponse
400
Bad Request 400
500
Server Side 500
using System.Web;
using com.ultracart.admin.v2.Api;
using com.ultracart.admin.v2.Model;

namespace SdkSample.oauth
{
    public class OauthAccessToken
    {
        /*
         * The first step in implementing an OAuth authorization to your UltraCart Developer Application is
         * creating a Client ID and Secret. See the following doc for instructions on doing so:
         * https://ultracart.atlassian.net/wiki/spaces/ucdoc/pages/3488907265/Developer+Applications+-+Creating+a+Client+ID+and+Secret+for+an+OAuth+Application
         * 
         * The second step is to construct an authorize url for your customers to follow and authorize your application.
         * See the oauthAuthorize.php for an example on constructing that url.
         * 
         * This method, OAuth.oauthAccessToken() will be called from within your redirect script, i.e. that web page the
         * customer is redirected to by UltraCart after successfully authorizing your application.
         * 
         * This example illustrates how to retrieve the code parameter and exchange it for an access_token and refresh_token.
         * 
         * Once you have your Client ID and Secret created, our OAuth security follows the industry standards.
         * 1. Construct an authorize url for your customers.
         * 2. Your customers will follow the link and authorize your application.
         * 3. Store their oauth credentials as best fits your application.
         * 
         * Parameters this script should expect:
         * code -> used to exchange for an access token
         * state -> whatever you passed in your authorize url
         * error -> if you have a problem with your application configure. Possible values are:
         *     invalid_request -> your authorize url has expired
         *     access_denied -> user said 'no' and did not grant access.
         * 
         * Parameters you will use to retrieve a token:
         * code -> the value provided as a query parameter from UltraCart, required if grant_type is 'authorization_code'
         * client_id -> your client id (see doc link at top of this file)
         * grant_type -> 'authorization_code' or 'refresh_token'
         * redirect_url -> The URI that you redirect the browser to start the authorization process
         * refresh_token -> if grant_type = 'refresh_token', you have to provide the refresh token. makes sense, yes?
         * 
         * See OauthTokenResponse for fields that are returned from this call.
         * All SDKs have the same field names with slight differences in capitalization and underscores.
         * https://github.com/UltraCart/rest_api_v2_sdk_csharp/blob/master/src/com.ultracart.admin.v2/Model/OauthTokenResponse.cs
         */
        public static void Execute()
        {
            string clientId = "5e31ce86e17f02015a35257c47151544";  // this is given to you when you create your application (see the doc link above)
            string grantType = "authorization_code";
            string redirectUrl = "https://www.mywebsite.com/oauth/redirect_here.php";
            string state = "denmark";  // this is whatever you used when you created your authorize url (see oauthAuthorize.php)

            // Note: You'll need to implement your own method to get the code from query parameters
            string code = HttpContext.Current.Request.QueryString["code"];
            string refreshToken = null;

            OauthApi oauthApi = new OauthApi(Constants.ApiKey);
            OauthTokenResponse apiResponse = oauthApi.OauthAccessToken(clientId, grantType, code, redirectUrl, refreshToken);

            // apiResponse is an OauthTokenResponse object
            string newRefreshToken = apiResponse.RefreshToken;
            string expiresIn = apiResponse.ExpiresIn;
        }
    }
}
package oauth;

import com.ultracart.admin.v2.OauthApi;
import com.ultracart.admin.v2.models.*;
import com.ultracart.admin.v2.util.ApiException;
import common.Constants;

public class OauthAccessToken {
    /*
     * The first step in implementing an OAuth authorization to your UltraCart Developer Application is
     * creating a Client ID and Secret. See the following doc for instructions on doing so:
     * https://ultracart.atlassian.net/wiki/spaces/ucdoc/pages/3488907265/Developer+Applications+-+Creating+a+Client+ID+and+Secret+for+an+OAuth+Application
     * 
     * The second step is to construct an authorize url for your customers to follow and authorize your application.
     * See the oauthAuthorize.php for an example on constructing that url.
     * 
     * This method, OAuth.oauthAccessToken() will be called from within your redirect script, i.e. that web page the
     * customer is redirected to by UltraCart after successfully authorizing your application.
     * 
     * This example illustrates how to retrieve the code parameter and exchange it for an access_token and refresh_token.
     * 
     * Once you have your Client ID and Secret created, our OAuth security follows the industry standards.
     * 1. Construct an authorize url for your customers.
     * 2. Your customers will follow the link and authorize your application.
     * 3. Store their oauth credentials as best fits your application.
     * 
     * Parameters this script should expect:
     * code -> used to exchange for an access token
     * state -> whatever you passed in your authorize url
     * error -> if you have a problem with your application configure. Possible values are:
     *     invalid_request -> your authorize url has expired
     *     access_denied -> user said 'no' and did not grant access.
     * 
     * Parameters you will use to retrieve a token:
     * code -> the value provided as a query parameter from UltraCart, required if grant_type is 'authorization_code'
     * client_id -> your client id (see doc link at top of this file)
     * grant_type -> 'authorization_code' or 'refresh_token'
     * redirect_url -> The URI that you redirect the browser to start the authorization process
     * refresh_token -> if grant_type = 'refresh_token', you have to provide the refresh token. makes sense, yes?
     * 
     * See OauthTokenResponse for fields that are returned from this call.
     * All SDKs have the same field names with slight differences in capitalization and underscores.
     * https://github.com/UltraCart/rest_api_v2_sdk_csharp/blob/master/src/com.ultracart.admin.v2/Model/OauthTokenResponse.cs
     */
    public static void execute() throws ApiException {
        String clientId = "5e31ce86e17f02015a35257c47151544";  // this is given to you when you create your application (see the doc link above)
        String grantType = "authorization_code";
        String redirectUrl = "https://www.mywebsite.com/oauth/redirect_here.php";
        String state = "denmark";  // this is whatever you used when you created your authorize url (see oauthAuthorize.php)

        // Note: You'll need to implement your own method to get the code from query parameters
        String code = null; // HttpContext equivalent needs to be implemented
        String refreshToken = null;

        OauthApi oauthApi = new OauthApi(Constants.API_KEY);
        OauthTokenResponse apiResponse = oauthApi.oauthAccessToken(clientId, grantType, code, redirectUrl, refreshToken);

        // apiResponse is an OauthTokenResponse object
        String newRefreshToken = apiResponse.getRefreshToken();
        String expiresIn = apiResponse.getExpiresIn();
    }
}
// Import API and UltraCart types
import { oauthApi } from '../api.js';

// Namespace-like structure using a class
export class OauthAccessToken {
  /*
   * The first step in implementing an OAuth authorization to your UltraCart Developer Application is
   * creating a Client ID and Secret. See the following doc for instructions on doing so:
   * https://ultracart.atlassian.net/wiki/spaces/ucdoc/pages/3488907265/Developer+Applications+-+Creating+a+Client+ID+and+Secret+for+an+OAuth+Application
   *
   * The second step is to construct an authorize url for your customers to follow and authorize your application.
   * See the oauthAuthorize.php for an example on constructing that url.
   *
   * This method, OAuth.oauthAccessToken() will be called from within your redirect script, i.e. that web page the
   * customer is redirected to by UltraCart after successfully authorizing your application.
   *
   * This example illustrates how to retrieve the code parameter and exchange it for an access_token and refresh_token.
   *
   * Once you have your Client ID and Secret created, our OAuth security follows the industry standards.
   * 1. Construct an authorize url for your customers.
   * 2. Your customers will follow the link and authorize your application.
   * 3. Store their oauth credentials as best fits your application.
   *
   * Parameters this script should expect:
   * code -> used to exchange for an access token
   * state -> whatever you passed in your authorize url
   * error -> if you have a problem with your application configure. Possible values are:
   *     invalid_request -> your authorize url has expired
   *     access_denied -> user said 'no' and did not grant access.
   *
   * Parameters you will use to retrieve a token:
   * code -> the value provided as a query parameter from UltraCart, required if grant_type is 'authorization_code'
   * client_id -> your client id (see doc link at top of this file)
   * grant_type -> 'authorization_code' or 'refresh_token'
   * redirect_url -> The URI that you redirect the browser to start the authorization process
   * refresh_token -> if grant_type = 'refresh_token', you have to provide the refresh token. makes sense, yes?
   *
   * See OauthTokenResponse for fields that are returned from this call.
   * All SDKs have the same field names with slight differences in capitalization and underscores.
   * https://github.com/UltraCart/rest_api_v2_sdk_csharp/blob/master/src/com.ultracart.admin.v2/Model/OauthTokenResponse.cs
   */
  static async execute(queryParams) {
    const clientId = "5e31ce86e17f02015a35257c47151544"; // this is given to you when you create your application (see the doc link above)
    const grantType = "authorization_code";
    const redirectUri = "https://www.mywebsite.com/oauth/redirect_here.php";
    const state = "denmark"; // this is whatever you used when you created your authorize url (see oauthAuthorize.php)

    // Note: In a real application, you'd get 'code' from query parameters in your server or client context
    const code = queryParams.code ?? undefined; // Example: from URL query string in a redirect handler
    const refreshToken = undefined;

    try {
      if (!code && grantType === "authorization_code") {
        throw new Error("No code provided for authorization_code grant type");
      }

      // UltraCart API call with parameters as an anonymous object
      const apiResponse = await new Promise((resolve, reject) => {
        oauthApi.oauthAccessToken(
          clientId,
          grantType, {
          code: code,
          redirectUri: redirectUri,
          refreshToken: refreshToken,
        }, function (error, data, response) {
          if (error) {
            reject(error);
          } else {
            resolve(data, response);
          }
        });
      });

      // apiResponse is an OauthTokenResponse object
      const newRefreshToken = apiResponse.refresh_token;
      const expiresIn = apiResponse.expires_in;

      console.log("OAuth Token Response:");
      console.log(`Refresh Token: ${newRefreshToken}`);
      console.log(`Expires In: ${expiresIn}`);
    } catch (ex) {
      console.log(`Error: ${ex.message}`);
      console.log(ex.stack);
    }
  }
}

// Example usage (for a Node.js server context, adjust as needed)
import { URL } from 'url'; // Node.js built-in module
const exampleQuery = new URL('https://example.com?code=abc123&state=denmark').searchParams;
OauthAccessToken.execute({
  code: exampleQuery.get('code') ?? undefined,
  state: exampleQuery.get('state') ?? undefined,
  error: exampleQuery.get('error') ?? undefined,
}).catch(console.error);
<?php

use ultracart\v2\api\OauthApi;

ini_set('display_errors', 1);

/*


The first step in implementing an OAuth authorization to your UltraCart Developer Application is
creating a Client ID and Secret.  See the following doc for instructions on doing so:
https://ultracart.atlassian.net/wiki/spaces/ucdoc/pages/3488907265/Developer+Applications+-+Creating+a+Client+ID+and+Secret+for+an+OAuth+Application

The second step is to construct an authorize url for your customers to follow and authorize your application.
See the oauthAuthorize.php for an example on constructing that url.

This method, OAuth.oauthAccessToken() will be called from within your redirect script, i.e. that web page the
customer is redirected to by UltraCart after successfully authorizing your application.

This example illustrates how to retrieve the code parameter and exchange it for an access_token and refresh_token.

Once you have your Client ID and Secret created, our OAuth security follows the industry standards.
1. Construct an authorize url for your customers.
2. Your customers will follow the link and authorize your application.
3. Store their oauth credentials as best fits your application.

Parameters this script should expect:
code -> used to exchange for an access token
state -> whatever you passed in your authorize url
error -> if you have a problem with your application configure.  Possible values are:
    invalid_request -> your authorize url has expired
    access_denied -> user said 'no' and did not grant access.

Parameters you will use to retrieve a token:
code -> the value provided as a query parameter from UltraCart, required if grant_type is 'authorization_code'
client_id -> your client id (see doc link at top of this file)
grant_type -> 'authorization_code' or 'refresh_token'
redirect_url -> The URI that you redirect the browser to start the authorization process
refresh_token -> if grant_type = 'refresh_token', you have to provide the refresh token.  makes sense, yes?

See OauthTokenResponse for fields that are returned from this call.
All SDKs have the same field names with slight differences in capitalization and underscores.
https://github.com/UltraCart/rest_api_v2_sdk_csharp/blob/master/src/com.ultracart.admin.v2/Model/OauthTokenResponse.cs

 */

$clientId = "5e31ce86e17f02015a35257c47151544";  // this is given to you when you create your application (see the doc link above)
$grant_type = "authorization_code";
$redirect_url = "https://www.mywebsite.com/oauth/redirect_here.php";
$state = "denmark";  // this is whatever you used when you created your authorize url (see oauthAuthorize.php)

$code = filter_input(INPUT_GET, 'code', FILTER_SANITIZE_STRING);
$refresh_token = null;

$oauth_api = OauthApi::usingApiKey(Constants::API_KEY);
$api_response = $oauth_api->oauthAccessToken($clientId, $grant_type, $code, $redirect_url, $refresh_token);

// $api_response is an OauthTokenResponse object.
var_dump($api_response);
$refresh_token = $api_response->getRefreshToken();
$expires_in = $api_response->getExpiresIn();
from ultracart.apis import OauthApi
from flask import request
from samples import api_client

"""
The first step in implementing an OAuth authorization to your UltraCart Developer Application is
creating a Client ID and Secret.  See the following doc for instructions on doing so:
https://ultracart.atlassian.net/wiki/spaces/ucdoc/pages/3488907265/Developer+Applications+-+Creating+a+Client+ID+and+Secret+for+an+OAuth+Application

The second step is to construct an authorize url for your customers to follow and authorize your application.
See the oauthAuthorize.php for an example on constructing that url.

This method, OAuth.oauthAccessToken() will be called from within your redirect script, i.e. that web page the
customer is redirected to by UltraCart after successfully authorizing your application.

This example illustrates how to retrieve the code parameter and exchange it for an access_token and refresh_token.

Once you have your Client ID and Secret created, our OAuth security follows the industry standards.
1. Construct an authorize url for your customers.
2. Your customers will follow the link and authorize your application.
3. Store their oauth credentials as best fits your application.

Parameters this script should expect:
code -> used to exchange for an access token
state -> whatever you passed in your authorize url
error -> if you have a problem with your application configure.  Possible values are:
    invalid_request -> your authorize url has expired
    access_denied -> user said 'no' and did not grant access.

Parameters you will use to retrieve a token:
code -> the value provided as a query parameter from UltraCart, required if grant_type is 'authorization_code'
client_id -> your client id (see doc link at top of this file)
grant_type -> 'authorization_code' or 'refresh_token'
redirect_url -> The URI that you redirect the browser to start the authorization process
refresh_token -> if grant_type = 'refresh_token', you have to provide the refresh token.  makes sense, yes?

See OauthTokenResponse for fields that are returned from this call.
All SDKs have the same field names with slight differences in capitalization and underscores.
https://github.com/UltraCart/rest_api_v2_sdk_csharp/blob/master/src/com.ultracart.admin.v2/Model/OauthTokenResponse.cs
"""

# this is given to you when you create your application (see the doc link above)
client_id = "5e31ce86e17f02015a35257c47151544"
grant_type = "authorization_code"
redirect_url = "https://www.mywebsite.com/oauth/redirect_here.php"
state = "denmark"  # this is whatever you used when you created your authorize url (see oauthAuthorize.php)

# Get the code from the request
code = request.args.get('code')
refresh_token = None

# Create OAuth API instance
oauth_api = OauthApi(api_client())

# Call the OAuth access token method
api_response = oauth_api.oauth_access_token(client_id=client_id, grant_type=grant_type,
                                            code=code, redirect_url=redirect_url,
                                            refresh_token=refresh_token)

# api_response is an OauthTokenResponse object.
print(api_response)

# Extract refresh token and expiration
refresh_token = api_response.refresh_token
expires_in = api_response.expires_in
require 'ultracart_api'
require_relative '../constants'

=begin

The first step in implementing an OAuth authorization to your UltraCart Developer Application is
creating a Client ID and Secret.  See the following doc for instructions on doing so:
https://ultracart.atlassian.net/wiki/spaces/ucdoc/pages/3488907265/Developer+Applications+-+Creating+a+Client+ID+and+Secret+for+an+OAuth+Application

The second step is to construct an authorize url for your customers to follow and authorize your application.
See the oauthAuthorize.rb for an example on constructing that url.

This method, OAuth.oauth_access_token() will be called from within your redirect script, i.e. that web page the
customer is redirected to by UltraCart after successfully authorizing your application.

This example illustrates how to retrieve the code parameter and exchange it for an access_token and refresh_token.

Once you have your Client ID and Secret created, our OAuth security follows the industry standards.
1. Construct an authorize url for your customers.
2. Your customers will follow the link and authorize your application.
3. Store their oauth credentials as best fits your application.

Parameters this script should expect:
code -> used to exchange for an access token
state -> whatever you passed in your authorize url
error -> if you have a problem with your application configure.  Possible values are:
    invalid_request -> your authorize url has expired
    access_denied -> user said 'no' and did not grant access.

Parameters you will use to retrieve a token:
code -> the value provided as a query parameter from UltraCart, required if grant_type is 'authorization_code'
client_id -> your client id (see doc link at top of this file)
grant_type -> 'authorization_code' or 'refresh_token'
redirect_url -> The URI that you redirect the browser to start the authorization process
refresh_token -> if grant_type = 'refresh_token', you have to provide the refresh token.  makes sense, yes?

See OauthTokenResponse for fields that are returned from this call.
All SDKs have the same field names with slight differences in capitalization and underscores.
https://github.com/UltraCart/rest_api_v2_sdk_csharp/blob/master/src/com.ultracart.admin.v2/Model/OauthTokenResponse.cs

=end

client_id = "5e31ce86e17f02015a35257c47151544"  # this is given to you when you create your application (see the doc link above)
grant_type = "authorization_code"
redirect_url = "https://www.mywebsite.com/oauth/redirect_here.php"
state = "denmark"  # this is whatever you used when you created your authorize url (see oauthAuthorize.rb)

code = params['code']  # Assuming this is running in a web framework that provides params
refresh_token = nil

oauth_api = UltracartClient::OauthApi.new_using_api_key(Constants::API_KEY)
api_response = oauth_api.oauth_access_token(client_id, grant_type, code, redirect_url, refresh_token)

# api_response is an OauthTokenResponse object.
puts api_response.inspect
refresh_token = api_response.refresh_token
expires_in = api_response.expires_in
// Import API and UltraCart types
import { oauthApi } from '../api';
import { OauthTokenResponse } from 'ultracart_rest_api_v2_typescript';

// Namespace-like structure using a class
export class OauthAccessToken {
  /*
   * The first step in implementing an OAuth authorization to your UltraCart Developer Application is
   * creating a Client ID and Secret. See the following doc for instructions on doing so:
   * https://ultracart.atlassian.net/wiki/spaces/ucdoc/pages/3488907265/Developer+Applications+-+Creating+a+Client+ID+and+Secret+for+an+OAuth+Application
   *
   * The second step is to construct an authorize url for your customers to follow and authorize your application.
   * See the oauthAuthorize.php for an example on constructing that url.
   *
   * This method, OAuth.oauthAccessToken() will be called from within your redirect script, i.e. that web page the
   * customer is redirected to by UltraCart after successfully authorizing your application.
   *
   * This example illustrates how to retrieve the code parameter and exchange it for an access_token and refresh_token.
   *
   * Once you have your Client ID and Secret created, our OAuth security follows the industry standards.
   * 1. Construct an authorize url for your customers.
   * 2. Your customers will follow the link and authorize your application.
   * 3. Store their oauth credentials as best fits your application.
   *
   * Parameters this script should expect:
   * code -> used to exchange for an access token
   * state -> whatever you passed in your authorize url
   * error -> if you have a problem with your application configure. Possible values are:
   *     invalid_request -> your authorize url has expired
   *     access_denied -> user said 'no' and did not grant access.
   *
   * Parameters you will use to retrieve a token:
   * code -> the value provided as a query parameter from UltraCart, required if grant_type is 'authorization_code'
   * client_id -> your client id (see doc link at top of this file)
   * grant_type -> 'authorization_code' or 'refresh_token'
   * redirect_url -> The URI that you redirect the browser to start the authorization process
   * refresh_token -> if grant_type = 'refresh_token', you have to provide the refresh token. makes sense, yes?
   *
   * See OauthTokenResponse for fields that are returned from this call.
   * All SDKs have the same field names with slight differences in capitalization and underscores.
   * https://github.com/UltraCart/rest_api_v2_sdk_csharp/blob/master/src/com.ultracart.admin.v2/Model/OauthTokenResponse.cs
   */
  public static async execute(queryParams: { code?: string; state?: string; error?: string }): Promise<void> {
    const clientId = "5e31ce86e17f02015a35257c47151544"; // this is given to you when you create your application (see the doc link above)
    const grantType = "authorization_code";
    const redirectUri = "https://www.mywebsite.com/oauth/redirect_here.php";
    const state = "denmark"; // this is whatever you used when you created your authorize url (see oauthAuthorize.php)

    // Note: In a real application, you'd get 'code' from query parameters in your server or client context
    const code = queryParams.code ?? undefined; // Example: from URL query string in a redirect handler
    const refreshToken: string | undefined = undefined;

    try {
      if (!code && grantType === "authorization_code") {
        throw new Error("No code provided for authorization_code grant type");
      }

      // UltraCart API call with parameters as an anonymous interface
      const apiResponse = await oauthApi.oauthAccessToken({
        clientId,
        grantType,
        code,
        redirectUri,
        refreshToken,
      });

      // clientId: string;
      // grantType: string;
      // code?: string;
      // redirectUri?: string;
      // refreshToken?: string;

      // apiResponse is an OauthTokenResponse object
      const newRefreshToken = apiResponse.refresh_token;
      const expiresIn = apiResponse.expires_in;

      console.log("OAuth Token Response:");
      console.log(`Refresh Token: ${newRefreshToken}`);
      console.log(`Expires In: ${expiresIn}`);
    } catch (ex) {
      console.log(`Error: ${(ex as Error).message}`);
      console.log((ex as Error).stack);
    }
  }
}

// Example usage (for a Node.js server context, adjust as needed)
import { URL } from 'url'; // Node.js built-in module
const exampleQuery = new URL('https://example.com?code=abc123&state=denmark').searchParams;
OauthAccessToken.execute({
  code: exampleQuery.get('code') ?? undefined,
  state: exampleQuery.get('state') ?? undefined,
  error: exampleQuery.get('error') ?? undefined,
}).catch(console.error);

Error

Attributes
Name Data Type Description
developer_message string A technical message meant to be read by a developer
error_code string HTTP status code
more_info string Additional information often a link to additional documentation
object_id string Object id that the error is associated with
user_message string An end-user friendly message suitable for display to the customer

ErrorResponse

Attributes
Name Data Type Description
error Error Error object if unsuccessful
metadata ResponseMetadata Meta-data about the response such as payload or paging information
success boolean Indicates if API call was successful
warning Warning Warning object if a non-fatal issue or side-effect occurs

OauthRevokeSuccessResponse

Attributes
Name Data Type Description
message string Message confirming revocation of credentials
successful boolean True if revoke was successful

OauthTokenResponse

Attributes
Name Data Type Description
access_token string Access token to use in OAuth authenticated API call
error string
error_description string
error_uri string
expires_in string The number of seconds since issuance when the access token will expire and need to be refreshed using the refresh token
refresh_token string The refresh token that should be used to fetch a new access token when the expiration occurs
scope string The scope of permissions associated with teh access token
token_type string Type of token
Allowed Values
  • bearer

ResponseMetadata

Attributes
Name Data Type Description
payload_name string Payload name
result_set ResultSet Result set

ResultSet

Attributes
Name Data Type Description
count integer (int32) Number of results in this set
limit integer (int32) Maximum number of results that can be returned in a set
more boolean True if there are more results to query
next_offset integer (int32) The next offset that you should query to retrieve more results
offset integer (int32) Offset of this result set (zero based)
total_records integer (int32) The total number of records in the result set. May be null if the number is not known and the client should continue iterating as long as more is true.

Warning

Attributes
Name Data Type Description
more_info string Additional information often a link to additional documentation
warning_message string A technical message meant to be read by a developer

307
Status Code 307: Temporary redirect to follow

Headers
Name Data Type Description
Location string The URL to redirect to

400
Status Code 400: bad request input such as invalid json

Headers
Name Data Type Description
UC-REST-ERROR string Contains human readable error message
Response
Name Data Type
body ErrorResponse

403
Status Code 403: forbidden

Headers
Name Data Type Description
UC-REST-ERROR string Contains human readable error message
Response
Name Data Type
body ErrorResponse

404
Status Code 404: not found

Headers
Name Data Type Description
UC-REST-ERROR string Contains human readable error message
Response
Name Data Type
body ErrorResponse

500
Status Code 500: any server side error. the body will contain a generic server error message

Headers
Name Data Type Description
UC-REST-ERROR string Contains human readable error message
Response
Name Data Type
body ErrorResponse